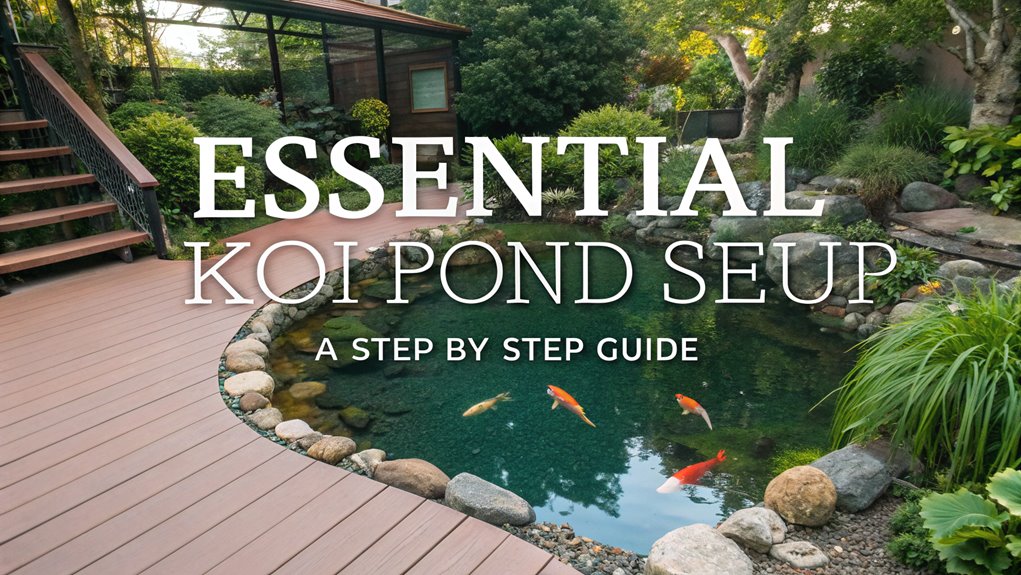
To create the perfect koi pond, select a level, well-drained spot, ideally near an outdoor GFCI outlet. Use a garden hose to outline your pond, aiming for varied depths and a minimum depth of 3 feet. After excavation, secure a 45 mil EPDM liner with rocks. Position a pump that cycles the pond’s volume hourly and integrate a robust filtration system. With these essentials, you’ll craft a thriving koi habitat. Explore further to enhance your setup.
TLDR
- Choose a level, well-drained area with access to power and water, avoiding underground utilities.
- Outline the pond shape with a garden hose and aim for a minimum depth of 3 feet.
- Excavate varying depths with shelves, positioning the deepest area for optimal water circulation.
- Install a 45 mil EPDM rubber liner with underlayment, securing edges with rocks or gravel.
- Set up a pump and filtration system to circulate the pond’s volume once per hour.
Selecting the Ideal Location
While planning your koi pond, selecting the ideal location is vital to guarantee both its functionality and aesthetic appeal.
Begin by choosing a level, well-drained area to prevent water accumulation, securing structural stability for your koi pond. The pond’s proximity to an outdoor GFCI outlet is essential for powering pumps and equipment efficiently.
Avoid areas with underground utilities by consulting local services before excavation to prevent potential hazards. A strategic balance of sun and shade will regulate water temperature and mitigate excessive algae growth.
Confirm easy access to an outdoor faucet for convenient water filling and maintenance. Finally, consider the pond’s visibility from your home, allowing for maximum enjoyment and observation of your aquatic ecosystem.
Designing and Marking the Pond Outline
After selecting the ideal location for your koi pond, it’s time to focus on designing and marking the pond outline with precision.
Collaborate with your contractor or utilize design software to guarantee the layout balances aesthetics and functionality.
Follow these steps for accuracy:
- Outline: Use a garden hose to delineate the pond’s shape, ensuring clarity before excavation. Confirm the area is well-drained and level.
- Depth: Plan for a minimum depth of 2 feet for effective thermal regulation and predator protection, accommodating varying depths for aquatic plants.
- Utilities: Contact local utility services to identify any underground pipes or cables, preventing damage during excavation.
This meticulous approach guarantees a pond that seamlessly integrates into its surroundings while supporting koi health and ecosystem balance.
Excavation and Depth Considerations
Ensuring your koi pond’s excavation meets the necessary depth requirements is essential for maintaining a healthy aquatic environment. Aim for a minimum depth of 3 feet to safeguard fish and regulate temperature, while a total depth of 2 feet prevents freezing in cold climates.
Strategically create varying depths, incorporating shelves for aquatic plants and positioning the deepest area at the pond’s lowest point to enhance water circulation.
Prioritize checking for underground utilities to avoid damaging hidden lines. Expand the initial excavation area by 1 foot beyond planned pond dimensions to accommodate liner installation.
For larger projects, using heavy equipment like a small excavator can expedite the process, whereas hand tools might suffice for smaller ponds.
Installing the Liner and Underlayment
As you commence on installing the liner and underlayment for your koi pond, it’s vital to start by laying down a protective underlayment over the excavated pond base. This step is significant to shield the flexible pond liner from sharp objects, enhancing its durability and ensuring ideal water quality.
Choose a 45 mil EPDM rubber liner, larger than the pond dimensions for adjustments. Follow these steps:
- Carefully position the liner, allowing it to conform naturally to the excavation, minimizing stress and wrinkles.
- Secure the liner edges with rocks or gravel to prevent water seepage and enable natural filtration.
- Check for watertight connections before you fill the pond, monitoring for leaks as water fills and interacts with water features.
Setting Up the Pump and Filtration System
To effectively set up the pump and filtration system for your koi pond, start by accurately positioning the water pump at the pond’s bottom. This guarantees ideal water circulation, essential for maintaining water clarity.
Choose a pump capable of circulating the entire pond volume at least once per hour. Next, dig a trench for the pond hose, allowing it to run below the surface to reduce visual clutter. Secure connections with hose clamps to prevent leaks and guarantee efficient water flow.
Install a robust filtration system including mechanical filters for debris capture and biological filtration to foster beneficial bacteria. Regularly check and clean the filtration system to avoid clogging, guaranteeing the pump’s efficiency and a healthy environment for koi.
Enhancing With Rocks, Gravel, and Additional Features
While enhancing your koi pond, incorporating rocks and gravel serves both aesthetic and functional purposes. These elements foster beneficial bacteria essential for biological filtration, thereby improving water clarity.
Strategically place larger stones along the pond’s edges to secure the liner and prevent wrinkles, while smaller gravel can be positioned at the bottom for enhanced filtration.
Introduce aquatic plants to the ecosystem alongside these substrates to mitigate algae growth through shading.
Here’s a focused approach:
- Rocks and Gravel: Promote beneficial bacteria and secure pond structure.
- Aquatic Plants: Reduce algae growth, creating a balanced habitat.
- Decorative Features and LED Lighting: Boost visual appeal and nighttime ambiance.
Incorporating these features not only enhances the Koi Pond’s ecosystem but also augments its overall visual appeal.
Introducing Fish and Maintaining Pond Health
Once you’ve finished setting up your koi pond’s structure, it’s crucial to shift to the introduction of fish and ongoing pond maintenance with precision.
Begin by ensuring the water quality is ideal with temperatures between 59°F and 77°F. Gradually introduce your koi fish to the pond to prevent thermal and pH shock, acclimating them over several hours.
Test the water regularly to maintain pH levels between 6.5 and 8.5, ammonia below 0.5 ppm, and nitrite at 0 ppm. A well-circulated environment with beneficial bacteria will bolster pond health.
Establish a feeding schedule based on water temperatures and koi activity, ensuring no excess food remains.
Perform weekly partial water changes (about 10%) and clean filters to sustain ecological balance.
Frequently Asked Questions
How to Build a Koi Pond Step by Step?
Begin by choosing a sun-shade balanced location. Outline your pond’s shape with a hose, digging three feet deep. Install an EPDM liner, set up a filtration system, introduce water and plants, then add koi, monitoring water quality.
Why Add Baking Soda to Koi Pond?
Contrasting unstable pH with controlled conditions, you add baking soda to stabilize alkalinity, ensuring koi health. By elevating water’s carbonate hardness, you prevent harmful pH fluctuations, promote beneficial bacterial growth, and maintain a balanced aquatic ecosystem.
What Do I Need to Know Before Building a Koi Pond?
Before building a koi pond, guarantee it’s at least 1,000 gallons. Select a balanced sun-shade location. Use a 45-mil EPDM liner, and install pumps, filters, and aerators. Regularly monitor pH and ammonia to maintain water quality.
What Equipment Do You Need for a Koi Pond?
Imagine serene koi gliding through crystal-clear water, juxtaposed with the hum of essential equipment. You’ll need mechanical filters, biological filters, a powerful water pump, aeration devices, a pond heater, and UV clarifiers for ideal water quality.
Conclusion
So, you’ve conquered the koi pond setup—congratulations! You’ve just created the aquatic equivalent of a five-star resort for your fishy friends, complete with the precision of a NASA mission. As your koi frolic in their meticulously engineered environment, remember: they’re not just fish; they’re your new little engineers, analyzing each rock placement with the scrutiny of a PhD committee. Maintain their habitat with the diligence of a mad scientist, and you’ll have a thriving underwater empire.

